Ultimate Guide to Tuxedo Cake: Layers of Chocolate Decadence
If you’re on the hunt for a show-stopping dessert that perfectly balances rich, velvety chocolate flavors with stunning, layered beauty, look no further than the Tuxedo Cake. This decadent treat brings together moist chocolate cake, luscious dark and white chocolate mousses, all topped off with a glossy milk chocolate ganache. Whether you’re planning a fancy dinner party, a special birthday, or just want to indulge your chocolate cravings, this cake delivers on both taste and visual appeal.
Tuxedo Cake gets its name from its striking contrast of dark and light layers, much like a classic black-and-white tuxedo. Throughout this article, we’ll explore what makes this cake so irresistible, how to craft each luxurious layer at home, and answer all your burning questions like “What does a tuxedo cake taste like?” or “Why do they call it tuxedo cake?”.
What is a Tuxedo Cake?
History and Origins of Tuxedo Cake
The Tuxedo Cake isn’t tied to a single cultural tradition but evolved from the concept of layered mousse cakes popularized in upscale European bakeries. Its refined presentation—dark chocolate cake alternating with creamy white and dark chocolate mousses—resembles a formal tuxedo suit, hence the playful name. Over the years, luxury bakeries and patisseries in the U.S. and Europe embraced this concept, offering Tuxedo Cakes as premium celebration centerpieces.
Many believe the cake rose in popularity alongside the trend for multi-textured chocolate desserts in the 1990s. Restaurants began serving variations topped with rich ganache and elegant chocolate curls, cementing its status as a “posh” dessert option.
Why is it called a Tuxedo Cake?
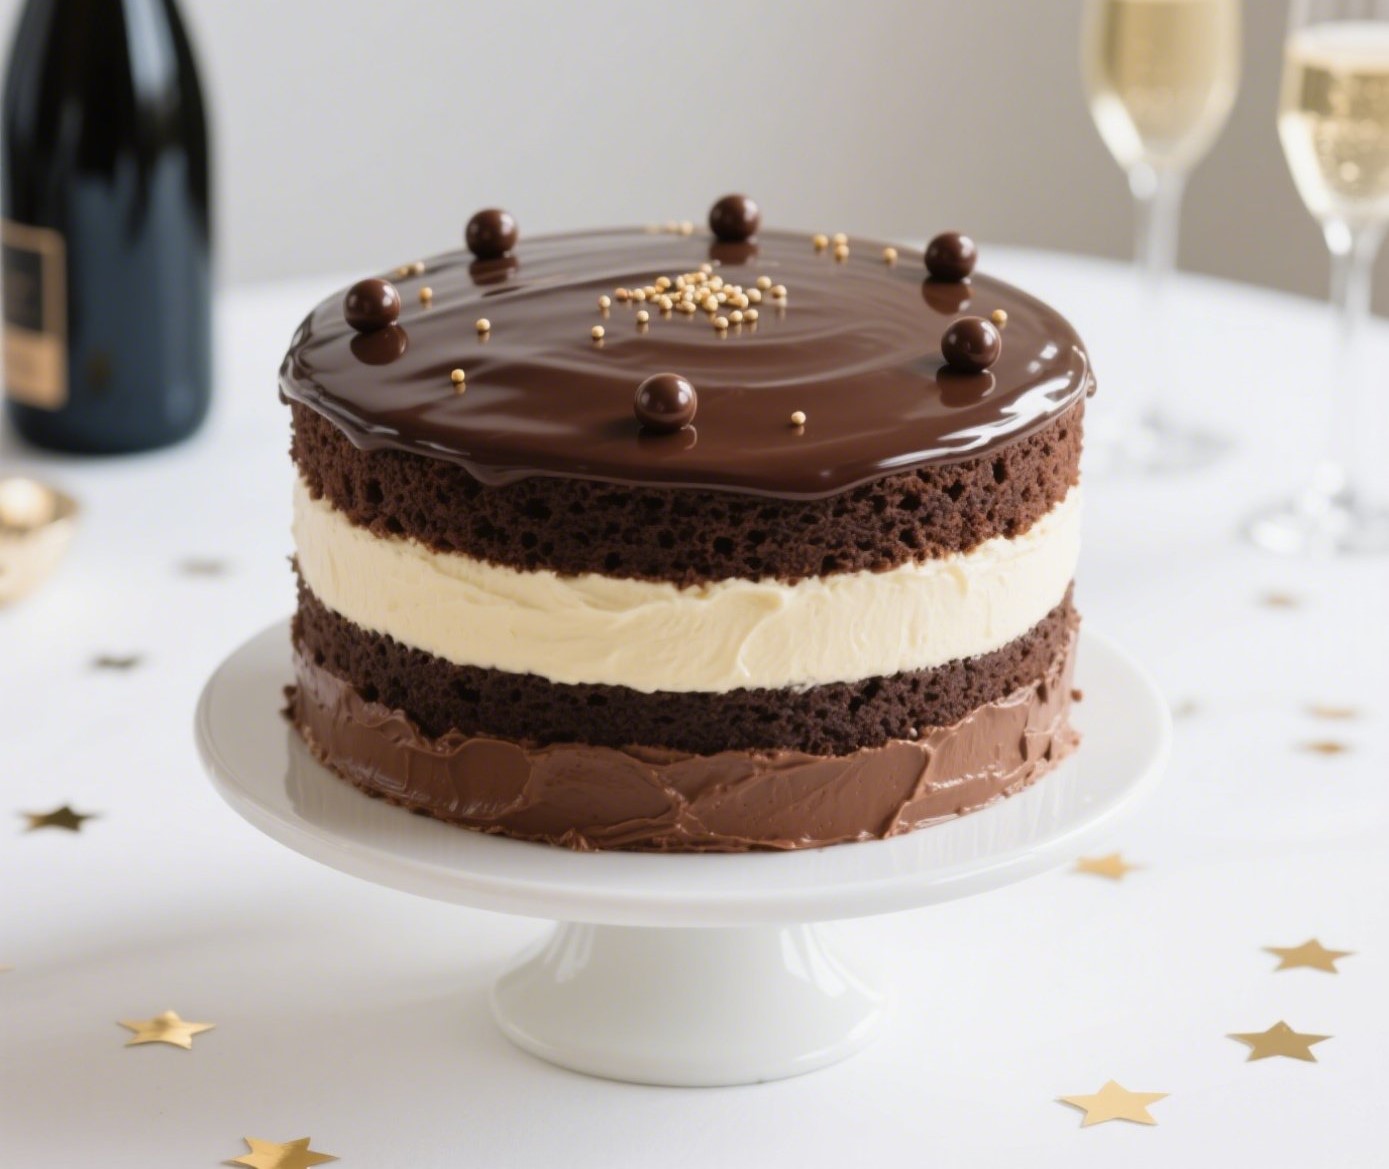
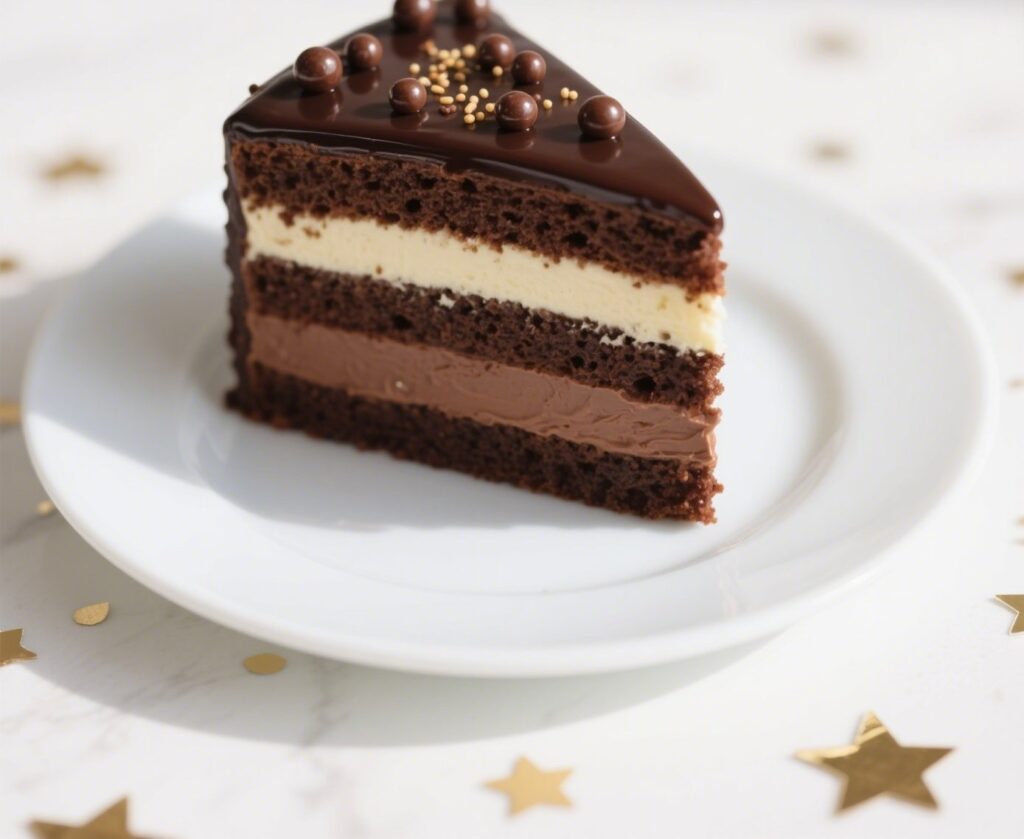
The name Tuxedo Cake directly references its striking appearance. Much like a classic black tuxedo paired with a crisp white shirt, this cake features alternating layers of dark and white—dark chocolate cake and mousse contrasted with white chocolate mousse—creating a sophisticated color palette. It’s meant to evoke elegance and luxury, making it a favorite for weddings, anniversaries, and black-tie events.
Plus, the smooth ganache topping often finished with delicate shavings or gold leaf gives it that extra bit of flair worthy of a formal affair.
Pair the rich indulgence of your Tuxedo Cake with the bright, zesty lift of a Sunrise Citrus Detox Juice—a perfect harmony of decadence and freshness.
What Does Tuxedo Cake Taste Like?
Flavor Profile: Rich Chocolates and Silky Mousses
Bite into a Tuxedo Cake, and you’re instantly met with a symphony of chocolate flavors and textures. The cake layers themselves are moist and slightly dense, crafted from cocoa, espresso, and sour cream that enhance the chocolate depth. Paired with the airy dark chocolate mousse, you get a bittersweet edge that beautifully complements the sweeter, creamier white chocolate mousse.
Each forkful balances:
- the slightly bitter notes of dark chocolate,
- the smooth, buttery sweetness of white chocolate,
- and the subtle vanilla undertones running through the mousses.
Then there’s the crowning glory: a glossy milk chocolate ganache that ties everything together with its luscious, melt-in-your-mouth richness.
This harmonious blend makes Tuxedo Cake more than just a chocolate cake—it’s a layered dessert experience, contrasting flavors in every bite.
Comparison with Triple Chocolate Mousse Cake
You might wonder: Isn’t this just a triple chocolate mousse cake?
Not quite.
A triple chocolate mousse cake typically skips the baked cake component entirely. It’s three mousse layers—dark, milk, and white chocolate—stacked directly on top of each other. The texture is uniform: all creamy, all airy.
By contrast, a Tuxedo Cake combines the structure of moist chocolate cake with the lightness of mousse layers. This interplay between dense cake and fluffy mousse gives the Tuxedo Cake a more satisfying bite, a bit of chew, and a striking visual contrast when sliced.
Plus, with the extra layer of ganache, it edges into decadent territory most mousse-only cakes don’t reach.
Want to explore more layered cake creations? Check out our collection of elegant desserts for your next celebration.
Ingredients for the Perfect Tuxedo Cake
Detailed List of Ingredients and Substitutions
Crafting a stunning Tuxedo Cake starts with gathering high-quality ingredients. Here’s the complete list for your recipe, with a few smart substitutions if you’re in a pinch.
| Component | Ingredients | Possible Substitutions |
|---|---|---|
| Chocolate Cake | 2 cups All-purpose Flour (240g) | Can use cake flour for lighter texture |
| 2 cups Granulated Sugar (400g) | Or brown sugar for deeper flavor | |
| ½ cup Cocoa Powder (50g) | Use Dutch-process for smoother taste | |
| 1 ½ tsp Baking Powder + 1 ½ tsp Baking Soda | – | |
| ½ tsp Salt | – | |
| ½ cup Whole Milk (120ml, room temp) | Almond milk for dairy-free | |
| 2 Large Eggs (room temp) | Flax eggs for vegan (texture slightly changes) | |
| ½ cup Sour Cream (128g, room temp) | Greek yogurt for similar tang | |
| ½ cup Vegetable Oil (110g) | Melted coconut oil works too | |
| 1 tsp Vanilla Extract | – | |
| 1 tsp Espresso Powder | Instant coffee granules | |
| 1 cup Hot Water (240ml) | Hot brewed coffee for stronger flavor | |
| Chocolate Mousses | 4 Egg Yolks | – |
| 2 cups Heavy Cream (480ml) | Coconut cream for dairy-free | |
| 2 tbsp Sugar + 2 tbsp Cornstarch | – | |
| 1 tsp Vanilla | – | |
| 3.5 oz Dark Chocolate (100g) | 70% cacao for rich taste | |
| 4.5 oz White Chocolate (130g) | – | |
| Ganache | 5 oz Milk Chocolate (140g) | Dark chocolate if less sweet is preferred |
| ⅓ cup Heavy Cream (80ml) | – |

Nutritional Breakdown and Calorie Information
This cake is undeniably a treat—rich, satisfying, and meant for special occasions. Based on your recipe, here’s the approximate nutrition per generous slice:
| Nutrient | Amount |
|---|---|
| Calories: | 584 kcal |
| Carbohydrates: | 69g |
| Protein: | 8g |
| Fat: | 33g |
| Saturated Fat: | 19g |
| Cholesterol: | 157mg |
| Sodium: | 333mg |
| Fiber: | 3g |
| Sugar: | 48g |
| Calcium: | 129mg |
| Iron: | 3mg |
How to Make the Chocolate Cake Layers
Mixing Dry and Wet Ingredients Correctly
Getting the base of your Tuxedo Cake right is crucial because it’s what anchors those silky mousse layers.
Start by preheating your oven to 350°F (180°C) and greasing two 8-inch round cake pans. You can also line the bottoms with parchment for extra insurance against sticking.
In a large bowl, sift together your dry ingredients:
- 2 cups all-purpose flour
- 2 cups granulated sugar
- ½ cup cocoa powder
- 1½ teaspoons baking powder
- 1½ teaspoons baking soda
- ½ teaspoon salt
Give everything a good whisk to combine. Sifting plus whisking helps avoid lumps and ensures an even rise.
In a separate bowl, whisk together your wet ingredients except for the hot water:
- 2 large eggs
- ½ cup whole milk
- ½ cup sour cream
- ½ cup vegetable oil
- 1 teaspoon vanilla extract
Stir until it’s smooth and homogenous. This might look slightly thick, which is perfect.
Now pour the wet mixture into your dry ingredients and whisk gently. Don’t over-mix; just combine until no streaks of flour remain.
Finally, in a small bowl or measuring cup, mix 1 teaspoon espresso powder with 1 cup hot water until dissolved. Slowly pour this into the batter. It will look thin—that’s exactly right. This hot coffee mixture deepens the chocolate flavor and helps keep the cake moist.
Baking and Cooling Techniques for Moist Cake
Evenly divide the batter between your two prepared pans. Bake for about 35 minutes, or until a skewer inserted into the center comes out clean or with just a few moist crumbs.
Once out of the oven:
- Let the cakes cool in their pans for 10-15 minutes.
- Carefully turn them out onto wire racks to cool completely.
Before building your cake, level off the domes with a serrated knife to ensure a stable stack. You can also slice them horizontally if you prefer thinner cake layers for an even more striking tuxedo stripe effect.
Preparing the Chocolate Mousses
Making the Dark Chocolate Mousse
This is where your Tuxedo Cake starts to shine—contrasting textures and flavors in every bite.
Start by finely chopping 3.5 oz (100g) dark chocolate and placing it in a heatproof bowl.
In another bowl, whisk together:
- 4 egg yolks
- 2 tablespoons granulated sugar
- 2 tablespoons cornstarch
Whisk until the mixture is pale and slightly thickened.
Meanwhile, pour 1 cup (240ml) of heavy cream plus ½ teaspoon vanilla into a saucepan. Warm over medium-low heat just until scalding—small bubbles should appear at the edges, but don’t let it boil.
Slowly drizzle a bit of this hot cream into the egg yolks while constantly whisking to temper them. This prevents scrambled eggs. Gradually pour in the rest, then return everything to the saucepan.
Cook over medium heat, stirring gently but constantly, until it thickens and boils for about 1-2 minutes.
Pour half of this hot custard over your chopped dark chocolate. Let it sit for a minute, then stir until the chocolate is completely melted and silky. Set aside to cool to room temperature.
When it’s cool, whip ½ of the remaining cream (1 cup divided into ½ for each mousse) to stiff peaks. Gently fold it into the dark chocolate mixture, being careful not to deflate it.
Making the White Chocolate Mousse
Repeat the same process with:
- 4.5 oz (130g) finely chopped white chocolate,
- and the remaining half of the custard base.
Pour the custard over the white chocolate, let it melt, and stir until smooth. Then whip the final ½ cup of heavy cream to stiff peaks and fold it in.
Assembling the Mousses on the Cake
Set your first cake layer inside a cake ring on a serving board.
- Pour the dark chocolate mousse on top, smoothing it evenly.
- Carefully layer the white chocolate mousse over it. Because dark chocolate sets a bit firmer, it naturally supports the white layer without mixing.
If your dark chocolate mousse is still too fluid, chill it for 15 minutes before adding the white mousse.
Place the cake in the fridge for 30 minutes, then top it with the second cake layer. Return to chill for at least 4 hours—overnight if possible—for best structure.
Assembling the Tuxedo Cake
Layering Techniques for Stability and Beauty
Now that your mousses have chilled and firmed slightly, it’s time to build that iconic tuxedo look.
- Place your first chocolate cake layer inside a sturdy cake ring or springform pan lined with acetate or parchment (this helps achieve sharp sides).
- Pour the dark chocolate mousse evenly over the cake, spreading it to the edges with an offset spatula. Give the pan a gentle tap on the counter to eliminate air pockets.
- Next, carefully spoon the white chocolate mousse on top. Smooth it out, making sure not to press too hard so the dark layer stays intact.
Once these layers are built, refrigerate the cake for at least 30 minutes. This step slightly firms up the mousses before adding the final cake layer.
Finally, place the second chocolate cake layer on top, pressing it down just lightly to set it in place. Return the entire cake to the fridge for a minimum of 4 hours, or ideally overnight. This ensures clean slices and keeps those contrasting layers intact.
Tips on Chilling and Firming the Cake
- Always chill your mousse just enough before layering—if it’s too runny, it will spill over; too stiff, and it won’t spread smoothly.
- Using acetate strips around the inside of your cake ring ensures professional-looking, perfectly even sides when you remove the mold.
- When ready to unmold, run a small knife or offset spatula around the edge before gently releasing the cake ring.
How to Make a Smooth Chocolate Ganache
Heating and Mixing for Glossy Ganache
This silky ganache isn’t just a topping—it’s the final tuxedo jacket, giving your cake that rich, luxurious finish.
Start by finely chopping 5 oz (140g) milk chocolate and placing it in a medium heatproof bowl.
Meanwhile, warm ⅓ cup (80ml) heavy cream in a small saucepan over medium heat until it’s scalding—meaning tiny bubbles start forming at the edges. Don’t let it boil.
Pour the hot cream over the chopped chocolate. Let it sit undisturbed for about 1 minute to soften the chocolate. Then slowly stir from the center outward until the ganache turns glossy and completely smooth.
If you see a few stubborn bits, microwave the bowl for 5-10 seconds and stir again. The texture should be thick enough to cling to a spoon but still fluid enough to spread.
Spreading and Decorating Like a Pro
Remove your chilled cake from the fridge and carefully slide off the cake ring or peel away the acetate. Pour the ganache directly on top of the cake. Using an offset spatula or the back of a spoon, gently push it toward the edges so it naturally flows and slightly drips down the sides.
Pro tip: Work quickly. Ganache thickens as it cools, so for a perfect mirror-like surface, smooth it out right after pouring.
Finish with optional decorations:
- dark chocolate shavings,
- mini chocolate chips,
- or gold sprinkles for a touch of glam.
Then return your cake to the fridge for 20-30 minutes so the ganache sets to a flawless sheen.
For more details on this decadent tuxedo cake and step-by-step inspiration, check out the full recipe on Bonni Bakery.
Common Questions About Tuxedo Cake
What does a tuxedo cake taste like?
A Tuxedo Cake is a rich yet balanced experience. You get the deep, slightly bittersweet notes of dark chocolate from the cake and dark mousse, paired with the creamy sweetness of the white chocolate mousse. The milk chocolate ganache ties it all together, creating a luxurious mouthfeel. The mix of textures—soft cake, airy mousse, smooth ganache—keeps every bite exciting.
What is a tuxedo mousse cake?
A tuxedo mousse cake refers to a style of cake that combines layers of moist chocolate cake with fluffy mousse—typically both dark and white chocolate. It’s named for its striking black and white appearance, just like a formal tuxedo suit. Often finished with a glossy ganache, it’s a favorite for elegant gatherings.
What is triple chocolate mousse?
Triple chocolate mousse is a layered dessert usually consisting of three distinct mousses: dark chocolate, milk chocolate, and white chocolate. Unlike a Tuxedo Cake, it typically doesn’t have baked cake layers and is all mousse from top to bottom. This makes it extra light and creamy, but without the texture contrast that cake provides.
What flavour is tuxedo cake?
It’s primarily a chocolate-lover’s dream. The cake has a robust cocoa flavor with a hint of espresso to intensify it. The mousses add both sweet and bittersweet chocolate notes, balanced by the vanilla undertones in the custard base. Together, they form a beautifully layered chocolate dessert that’s rich but not overwhelmingly sweet.
Why do they call it tuxedo cake?
Because of its elegant presentation. The contrast between the dark chocolate cake and mousse against the white chocolate mousse resembles the black-and-white style of a tuxedo. It’s a playful nod to a classic formal outfit, signaling that this cake is fit for upscale occasions.
What is the most posh cake?
While many consider opera cakes, croquembouche, and entremets to be the height of patisserie elegance, the Tuxedo Cake stands right alongside them. Its clean layers, glossy ganache, and dramatic contrast make it a popular choice for weddings, anniversaries, and black-tie events—essentially any celebration that calls for a bit of edible luxury.
Serving, Storing and Creative Variations
How to Slice and Serve Tuxedo Cake for Best Presentation
You’ve put all this work into creating sharp layers and a stunning ganache—so let’s serve it right.
- Use a sharp serrated knife dipped in hot water and wiped dry between cuts. This prevents dragging the ganache and mousse, giving you pristine, bakery-style slices.
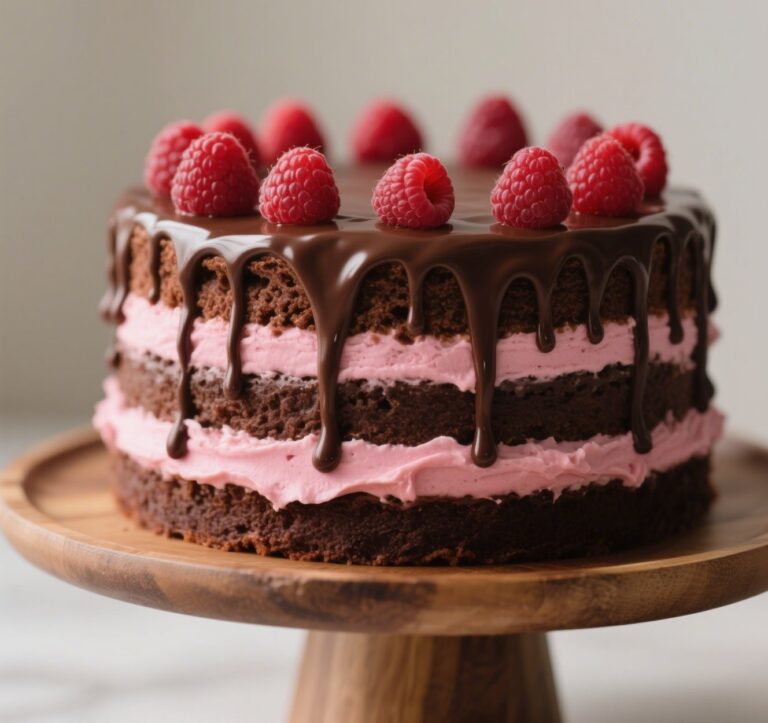
- For an extra flourish, plate each piece with a drizzle of raspberry sauce or a dollop of whipped cream. The slight tartness from fruit sauces balances the chocolate beautifully.
Storage Tips to Keep it Fresh Longer
This cake actually improves slightly overnight as the layers meld together. Store your tuxedo cake by:
- Refrigerating it covered in a cake container or loosely with plastic wrap for up to 5 days.
- Avoid airtight containers pressed tightly against the ganache to preserve its glossy finish.
You can also freeze individual slices wrapped well in plastic and foil for up to 2 months. Thaw overnight in the fridge.
Fun Variations: Raspberry Tuxedo Cake, Mini Tuxedo Cakes
Once you’ve mastered the basic recipe, there are plenty of ways to customize:
| Variation | How to do it |
|---|---|
| Raspberry Tuxedo Cake | Add a thin layer of raspberry preserves on the cake layers before the mousse. Decorate with fresh berries. |
| Mini Tuxedo Cakes | Use ring molds or cut circles from sheet cake, layer mousse in small towers—perfect for individual servings. |
| Extra Ganache Drip | Chill your cake, then drizzle slightly thinner ganache over the top to create stylish drips down the sides. |

Ultimate Guide to Tuxedo Cake: Layers of Chocolate Decadence
- Total Time: 5 hours
- Yield: 12 servings 1x
Description
Elegant layered cake with moist chocolate base, dark & white chocolate mousses, finished with silky ganache.
Ingredients
For the Chocolate Cake
- 2 cups All-purpose Flour 240g
- 2 cups Granulated Sugar 400g
- ½ cup Cocoa Powder 50g
- 1 ½ teaspoon Baking Powder
- 1 ½ teaspoon Baking Soda
- ½ cup Whole Milk 120g / 120ml (room temperature)
- 2 Large Eggs (room temperature)
- ½ cup Sour Cream 128g (room temperature)
- ½ cup Vegetable Oil 110g
- 1 teaspoon Espresso Powder
- 1 teaspoon Vanilla Extract
- ½ teaspoon Salt
- 1 cup Hot Water 240g / 240ml
For the Chocolate Mousses
- 4 Large Egg Yolks
- 2 cups Heavy Cream 480g / 480ml
- 2 tablespoon Granulated Sugar
- 2 tablespoon Cornstarch
- 1 teaspoon Vanilla
- 3.5 oz Dark Chocolate 100g
- 4.5 oz White Chocolate 130g
For the Chocolate Ganache
- 5 oz Milk Chocolate 140g
- ⅓ cup Heavy Cream 80g / 80ml
Instructions
Make the Chocolate Cake
- Preheat your oven to 350°F / 180°C and grease two 8-inch cake pans.
- In a large bowl, sift the dry ingredients, including the flour, sugar, cocoa powder, baking powder, baking soda, and salt. Whisk everything together.
- 2 cups All-purpose Flour,2 cups Granulated Sugar,½ cup Cocoa Powder,1 ½ teaspoon Baking Powder,1 ½ teaspoon Baking Soda,½ teaspoon Salt
- In a separate bowl, combine all the wet ingredients, except the hot water, which includes the eggs, milk, sour cream, vegetable oil and vanilla. Whisk together lightly until it makes a homogeneous mixture.
- ½ cup Whole Milk,2 Large Eggs,½ cup Sour Cream,½ cup Vegetable Oil,1 teaspoon Vanilla Extract
- Pour the wet ingredients into the dry and whisk until everything is combined and there are no lumps.
- In a small bowl or a glass, combine the hot water with the espresso powder and mix until completely dissolved. Pour into the cake batter and mix until combined.
- 1 teaspoon Espresso Powder,1 cup Hot Water
- Divide the batter evenly between your two cake pans and bake for 35 minutes, or until a skewer inserted comes out clean.
- Let the cakes cool completely before removing them from the pans. Level off the tops of the cakes with a serrated knife or cake leveler, so they are completely flat. You may also want to cut the layers down to a thinner size if you want a thinner layer of cake.
- Place a cake ring on top of a cake board or serving plate and place one of the layers of cake on the bottom. Set aside until the mousse is ready
- Make the Chocolate Mousses
- Chop up the dark chocolate and white chocolate finely and put them into two separate bowls. Set aside.
- 3.5 oz Dark Chocolate,4.5 oz White Chocolate
- Put egg yolks in a bowl with the sugar and cornstarch and whisk until they become slightly thick and pale.
- 4 Large Egg Yolks,2 tablespoon Granulated Sugar,2 tablespoon Cornstarch
- Divide the heavy cream in half so you have two bowls containing 1 cup / 240ml each. Set one of the bowls aside – we will whip this up later.
- 2 cups Heavy Cream,1 teaspoon Vanilla
- Pour the other bowl of cream into a saucepan with the vanilla and warm over medium-low heat until it is scalding hot.
- This means it is giving off steam and there are tiny bubbles appearing on the surface. Don’t let it boil.
- Drizzle a little of the hot cream into the egg yolks and whisk it in.
- Keep drizzling a little more, whisking the whole time, until all the cream is added. Then pour the entire mixture back into the saucepan and return to the heat.
- Heat the mixture, whisking constantly (but not vigorously – just enough to keep it moving and avoid burning) until it begins to boil. Boil for 1-2 minutes until it begins to thicken.
- Remove from the heat and put half of the mixture into the bowl with dark chocolate and half in with the white chocolate. Mix each bowl until the chocolate has completely melted.
- In a separate bowl, whip up the reserved heavy cream until stiff peaks form.
- By the time you have whipped the cream, the custard mousses should have cooled to room temperature.
- If they are still warm, let them cool completely, then split the whipped cream evenly between the two chocolate mousse mixtures and fold it in gently until completely combined.
- Pour the dark chocolate mousse on top of the cake layer in your dessert ring and smooth it out with a spatula.
- Pour the white chocolate mousse on top and smooth it out in the same way. The dark chocolate will be a lot firmer than the white chocolate, so you should be able to pour the white chocolate mousse on top without them mixing together.
- If your dark chocolate is still very liquid, put it in the fridge for a few minutes after pouring it onto the cake before adding the white chocolate layer.
- Put the entire cake in the fridge for 30 minutes. After 30 minutes, add the second cake layer on top, then return to the fridge to set for at least 4 hours.
- Make the Chocolate Ganache
- Once the cake has been chilling for at least 4 hours, remove it from the fridge and release it from the cake ring. Return to the fridge while you make your ganache.
- Chop your chocolate finely and place it in a bowl.
- 5 oz Milk Chocolate
- Heat the cream on medium heat, just until scalding (tiny bubbles just starting to form). Don’t let it boil. Remove from the heat and pour the cream over the chocolate. Let it sit for a minute.
- ⅓ cup Heavy Cream
- Mix the cream and the chocolate together until completely melted, glossy and smooth. Let it cool completely to room temperature. It should be thick enough that it won’t just run off the side of the cake, but thin enough to spread out into a nice smooth layer on top of the cake.
- Spread the ganache on top of the cake and use a spatula or knife to spread it out to the edges.
- Decorate with sprinkles or chocolate shavings.
Notes
I always recommend measuring your ingredients with a scale rather than with cups – it’s very hard to be accurate when measuring with cups and incorrect quantities could mess up your entire bake! So, for best results, always use a scale. All my recipes provide measurements in both cups and grams so you can choose what works best for you.
- Prep Time: 1 hour
- Cook Time: 35 minutes
- Category: Dessert
- Method: Baking
- Cuisine: International / Modern
Nutrition
- Serving Size: 1 slice (1/12 cake)
- Calories: 584 kcal
- Sugar: 48 g
- Sodium: 333 mg
- Fat: 33 g
- Saturated Fat: 19 g
- Unsaturated Fat: 11 g
- Trans Fat: 0.01 g
- Carbohydrates: 69 g
- Fiber: 3 g
- Protein: 8 g
- Cholesterol: 157 mg